As AI continues to evolve beyond traditional chatbots and Q&A systems, the real frontier lies in agent systems—intelligent assistants that not only answer questions but take actions, invoke tools, and automate tasks.
With the recent partnership between Anthropic and Databricks, it’s now possible to integrate the powerful Claude 3.7 Sonnet model directly within your Databricks workspace. Even better—Databricks has made it easier than ever to build these agents natively, using your own data and custom tools.
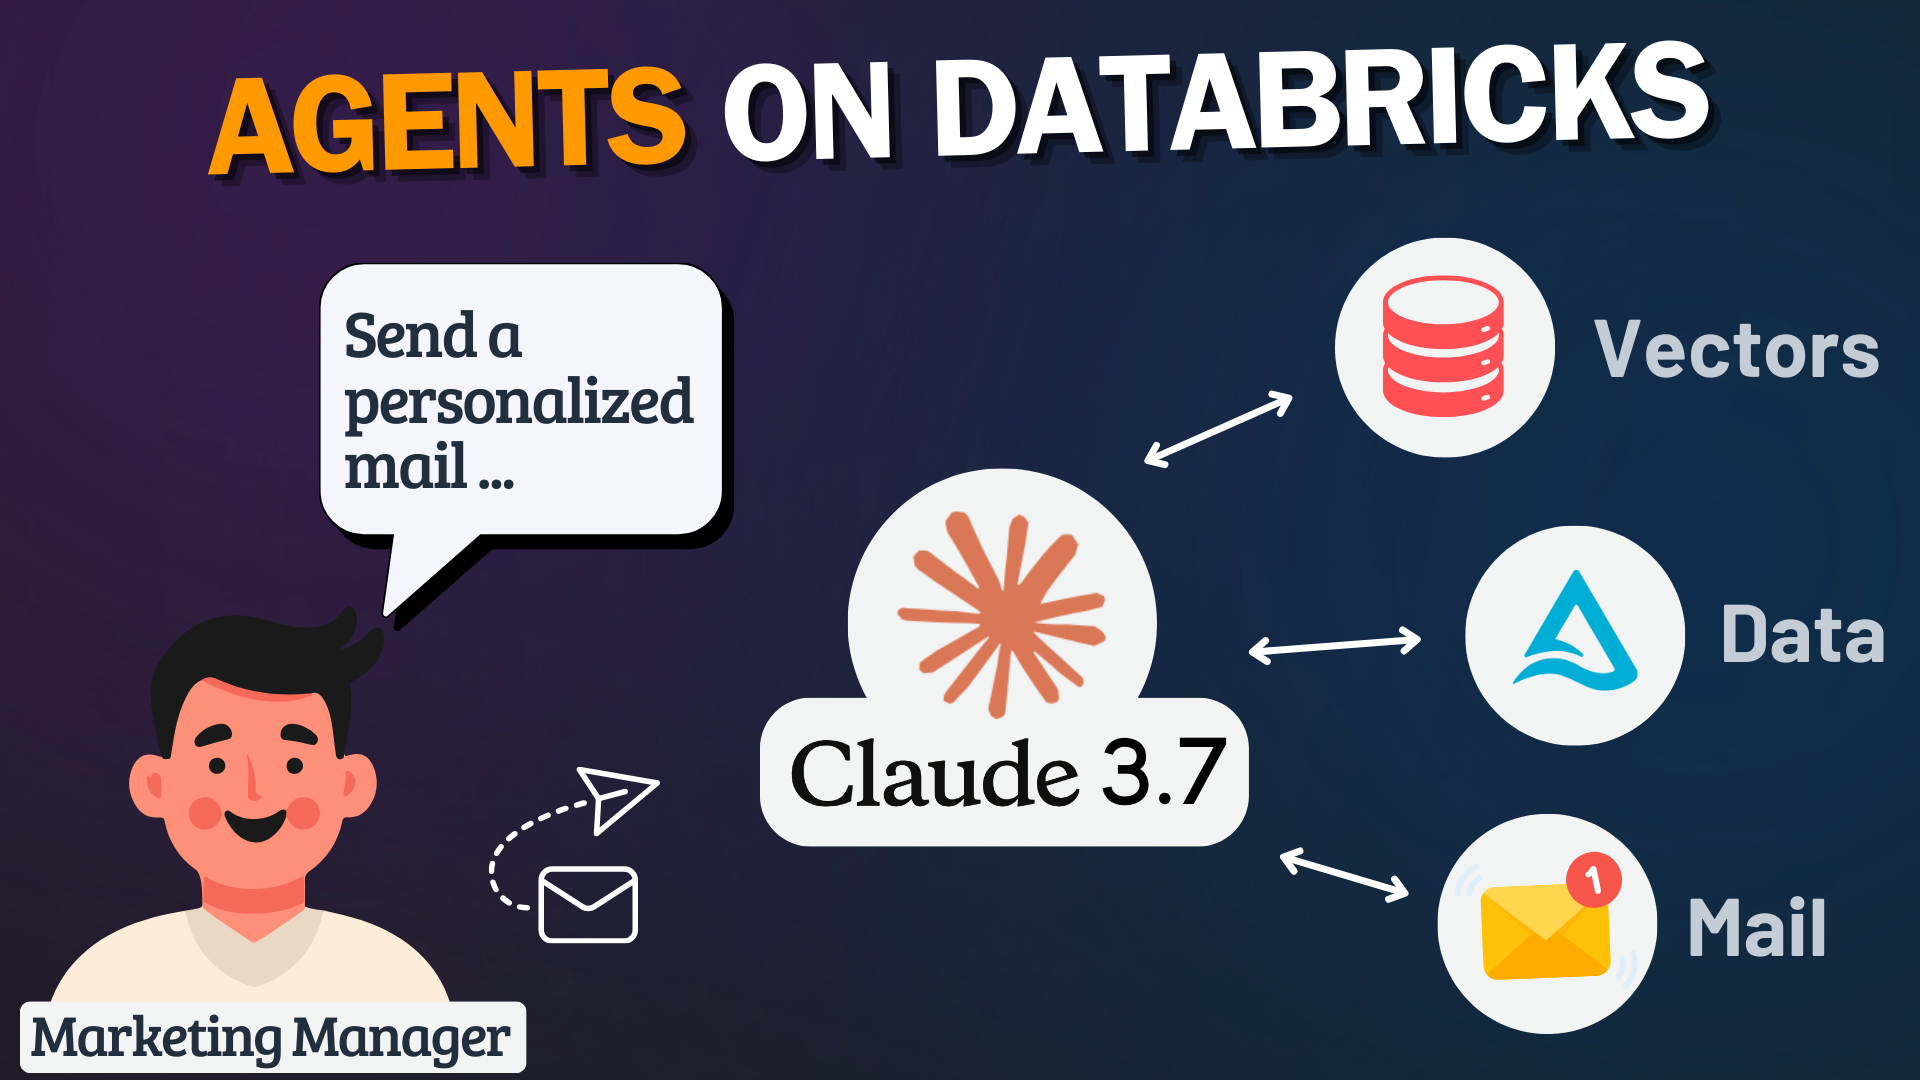
In this guide, we’ll build a smart Marketing Assistant Agent that:
- Retrieves customer data
- Uses vector search to find product descriptions
- Generates a personalized marketing email
- Sends it out using AWS SES
All using Databricks, Claude 3.7, and a few simple SQL and Python functions.
Step 1: Set Up Your Free Databricks Account
To get started, head over to signup.databricks.com and choose the Express setup. You’ll receive some free credits and get access to a fully functional serverless Databricks workspace—no need to set up a cloud account, networking, or storage configurations.
💡 Tip: The Playground is your testbed for experimenting with models like Llama or Claude, and for registering functions (also known as tools) that your agent can use during execution.
Once you’re in, navigate to Serving → Playground and you should see the native integration with Claude 3.7 available in the model selector.
⚠️ Don’t see Claude 3.7? That’s likely because your workspace is not hosted in a US region—Claude is currently only available in the US.
As a temporary solution for testing—or if your company policy permits—you can disable cross-geo processing in your workspace settings. For detailed instructions, refer to this documentation.
Native Claude hosting in European regions is expected soon, which will remove this limitation.
Step 2: Define the Agent Tools in Unity Catalog
The core idea of agent systems in Databricks is simple: you create Python or SQL functions, register them in Unity Catalog, and make them available to your agent via the Playground.
In our case, we’ll implement three tools that the Claude agent will automatically call to complete its workflow:
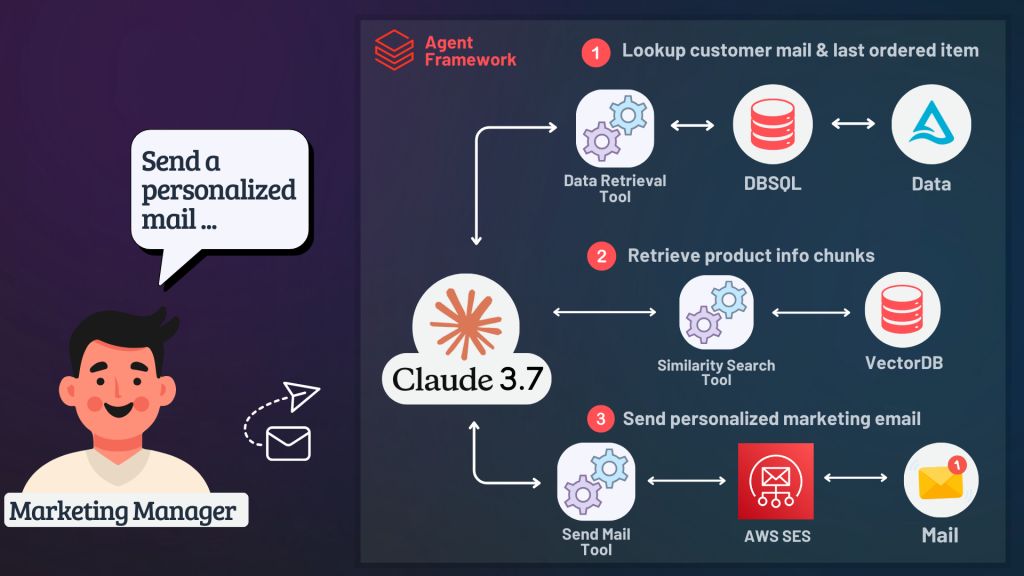
Let’s define these three functions in Unity Catalog:
🔎 1. Lookup Customer Info
This function retrieves essential customer metadata based on their name—specifically the customer ID, email address, and last viewed item. It allows the agent to dynamically fetch customer information at runtime.
CREATE OR REPLACE FUNCTION agent.claude.lookup_customer_info(
  input_customer_name STRING COMMENT 'Name of the customer whose info to look up'
)
RETURNS STRING
COMMENT "Returns metadata about a particular customer given the customer name, including the customer's email, ID and last viewed item. The
customer ID can be used for other queries."
RETURN SELECT CONCAT(
    'Customer ID: ', customer_id, ', ',
    'Customer Email: ', customer_email, ', ',
    'Last Viewed Item: ', last_viewed_item
  )
  FROM agent.claude.customer_info
  WHERE customer_name = input_customer_name
  LIMIT 1;
✅ This function allows Claude to dynamically retrieve a customer’s email and last viewed item based on their name.
🧠 2. Product Description Similarity Search
After retrieving the last viewed item, the agent uses this function to search a vector database for similar product descriptions. This helps enrich the email content with key benefits and highlights of the item.
CREATE OR REPLACE FUNCTION agent.claude.product_description_similarity_search (
  query STRING
  COMMENT 'The query string for searching product documents.'
) RETURNS TABLE
COMMENT 'Executes a search on product documents to retrieve text documents most relevant to the input query.'
RETURN
SELECT
  chunk_text as page_content,
  id as metadata
FROM
  vector_search(
    index => 'agent.claude.product_description_vs_index',
    query => query,
    num_results => 5
  );
💡 This enables the agent to enrich customer communication with highly relevant product details pulled directly from the vector search index.
To enable this functionality, you first need to have a Delta table prepared that contains chunked product documents along with their corresponding vector embeddings. Then, a Vector Search Index must be created on top of this table using Databricks Vector Search.
⚙️ This blog post does not cover the full setup of chunking documents or creating the vector search index. You can follow this official guide: How to create and query a vector search index.
📧 3. Send Email via AWS SES
Finally, this Python-based function takes the personalized email content and sends it out to the customer using Amazon’s Simple Email Service (SES). It uses a basic HTML template to structure the email nicely.
CREATE OR REPLACE FUNCTION agent.claude.send_email_via_ses(
  recipient_email STRING COMMENT 'Recipient email address',
  subject STRING COMMENT 'Subject of the email.',
  message STRING COMMENT 'Plain text content for the email body.'
)
RETURNS STRING
LANGUAGE PYTHON
AS $$
import boto3

def send_email_via_ses(recipient_email, subject, message):
    aws_access_key = "ABC"
    aws_secret_key = "DEF"
    aws_region = "eu-central-1"

    ses_client = boto3.client(
        "ses",
        aws_access_key_id=aws_access_key,
        aws_secret_access_key=aws_secret_key,
        region_name=aws_region
    )

    sender_email = "thomas.hass@datamyself.ai"

    html_template = f"""
    <html>
    <head><style>/* Email CSS styles here */</style></head>
    <body>
      <div class='container'>
        <h2>{subject}</h2>
        {message}
        <p style='text-align:center'>
          <a href='https://yourstore.com' class='cta'>Shop Now</a>
        </p>
        <p class='footer'>Thanks for being a valued part of our community.</p>
      </div>
    </body>
    </html>
    """

    response = ses_client.send_email(
        Source=sender_email,
        Destination={"ToAddresses": [recipient_email]},
        Message={
            "Subject": {"Data": subject},
            "Body": {
                "Text": {"Data": "Please view this in HTML format."},
                "Html": {"Data": html_template}
            }
        }
    )

    return response["MessageId"]

return send_email_via_ses(recipient_email, subject, message)
$$;
🚨 In production environments, make sure to move sensitive information like AWS credentials into Databricks Secrets or AWS Secrets Manager.
Step 3: Configure the Agent in Playground
Now that all necessary tools (functions) are created, we can move over to the Databricks Playground to configure and test our agent system.
First, open Serving → Playground in your Databricks workspace. Here you can bring everything together:
- Model: Select
as the foundation model.Claude 3.7 Sonnet
- Tools: Attach the tools by specifying
to include all three functions we created earlier.agent.claude.*
- System Prompt: Provide clear instructions to guide the agent’s behavior, such as the expected workflow and style of the marketing email.
Here’s an example of a simple system prompt you can use:
🛠️ View System Prompt (Agent Instructions)
You are a marketing assistant specializing in personalized campaigns for clothes and shoes. Your goal is to create highly targeted and engaging marketing emails for customers based on their preferences, past interactions, and product interests.

### Workflow:
1. Understand the campaign requirements by extracting necessary details from the user input.
2. Retrieve customer data:
   - Look up the customer using lookup_customer_info("Robert Johnson").
   - If product details are missing, retrieve them using product_description_similarity_search(last_viewed_product).
3. Generate an email *message body only*:
   - *Do NOT include HTML headers, styles, or buttons.*
   - The function already applies standard formatting.
   - The message should be *written in plain HTML* (e.g., use <p>, <ul>, <li>, but no <head> or <body> tags).

---

### *Example User Input:*
*"Write a marketing email to Robert Johnson highlighting the benefits of his last viewed product and offer a 10% discount using code: ABC.
Ensure the email follows the standard format, but only provide the *message body*, as the function will apply the full HTML template."

---

### *Expected LLM Output (Only Message Body)*

<p>Dear Robert Johnson,</p>
<p>We noticed you recently checked out the <strong>Zenith Pro Smartwatch</strong>, and we think it’s the perfect fit for your lifestyle!</p>
<ul>
    <li><strong>Advanced Health Tracking:</strong> Heart rate, sleep, and oxygen monitoring.</li>
    <li><strong>10-Day Battery Life:</strong> Long-lasting performance for all-day use.</li>
    <li><strong>Premium Design:</strong> Sleek aluminum frame & sapphire glass display.</li>
</ul>
<p><strong>Exclusive Offer Just for You:</strong></p>
<p>Use code <strong>ABC</strong> at checkout to get <strong>10% off</strong> your next purchase!</p>
<p>Thank you for being a valued part of our community. We can't wait to see you elevate your fitness journey with the Zenith Pro Smartwatch!</p>
Once everything is configured, you can start interacting with your agent by sending prompts like:
“Send a marketing email to Thomas highlighting the benefits of his last viewed product and offer a 10% discount code.”
The agent will then automatically:
- Look up the customer information
- Retrieve the product description
- Generate the personalized email content
- Send out the email
🚀 Next Steps: Export and Deploy Your Agent
Once you are happy with the agent’s behavior in the Playground, you can export the generated agent code with just a few clicks. The exported code is based on LangChain and includes all configuration details (tools, prompts, model).
From there, you can:
- Refine and customize the agent logic
- Integrate additional tools or validations
- Deploy the agent to a Model Serving Endpoint inside Databricks
🎯 Congratulations! You now have a working end-to-end marketing assistant powered by Claude 3.7 and Databricks.
Closing Thoughts
In this blog post, we built a fully functional, serverless marketing assistant agent using Claude 3.7 and Databricks—without needing complex infrastructure setup or extensive coding.
This example is just the beginning. From here, you can expand your agent to support more marketing campaigns, integrate with CRM systems, or automate other workflows across your business. The combination of Claude’s reasoning power and Databricks’ native agent support opens up a lot of exciting possibilities.
🎥 If you prefer a more visual, step-by-step guide, I’ve also recorded a full YouTube walkthrough of the entire process—from setting up your Databricks workspace to sending the first live marketing email. Feel free to check it out here: